Exporting to an editor
Take an edit into Premiere Pro.
An export is an XML project and the media it references — not a finished video.
Use it when the edit needs finishing somewhere else. Use rendering when you want a file to hand over.
The two are independent. You can render an output and export the same edit, in either order.
Open the Export Timeline panel
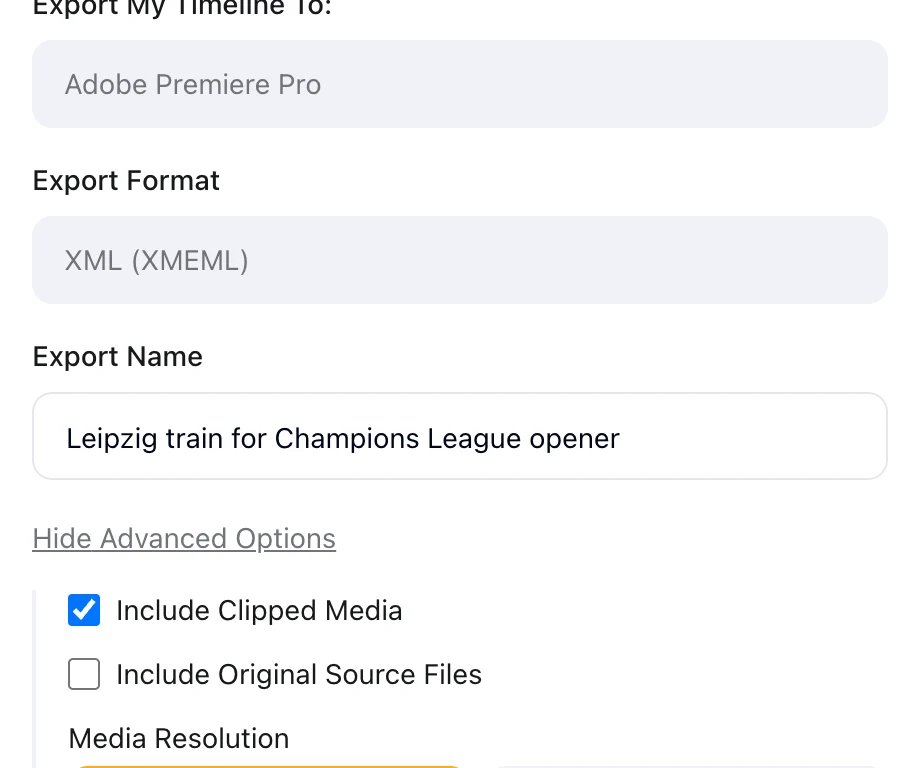
Click Export in the Editing Suite's right rail. The panel is titled Export Timeline.
The top two rows state where the timeline is going and in what format. Below them is Export Name, which starts as the output's name and can be changed.
Exporting spends no credits. An account with no spendable credits has exports paused until credits are added.
Advanced options
Choose Show Advanced Options for the settings that change what lands in the package.
| Option | Setting |
|---|---|
| Include Clipped Media | On by default |
| Include Original Source Files | Off by default |
| Media Resolution | Full, or Proxy |
| Portrait Reframe | Reframe, or Render |
| Frame Rate Mode | Preserve, and read-only |
| Retention (days) | 7 by default |
Portrait Reframe decides how vertical framing travels. Reframe writes editable Basic Motion pan keyframes that approximate the mobile preview, while Render bakes each reframed clip to match the preview exactly.
Retention accepts a whole number of days, from a minimum of 1 to a maximum of 30.
Start the export
- Set the export name and any advanced options
- Click Start Export
- Watch the job appear in Export History
The button reads Validating..., then Starting Export.... Prism saves the edit first if you have unsaved changes.
Validation never blocks an export. Errors and warnings are collected and shown afterwards on the job row, with a suggestion for each.
Track the job
Export History lists the twenty most recent jobs for the edit and refreshes every five seconds.
Each row moves through Pending, Preparing, Converting and Packaging before reaching Completed. A job can also end as Failed or Expired.
Each row shows the job's ID and when it started, with a percentage while it runs. A completed row adds how many clips the package holds.
Download and delete
Click the download icon on a completed row. The package opens in a new tab.
The trash icon deletes a job. Prism asks you to confirm, then removes the package and its files permanently.
When retention lapses the row reads Expired and the download is gone. Re-export the timeline to get it back.
FAQ
Can I export a saved version of the edit?
No. Exports always use the current state of the edit. Restore the version you want first, then export.